This post contains affiliate links which we are compensated for if a purchase is made. Using links costs you nothing and helps to support the ongoing creation of content. Thank you for using them.
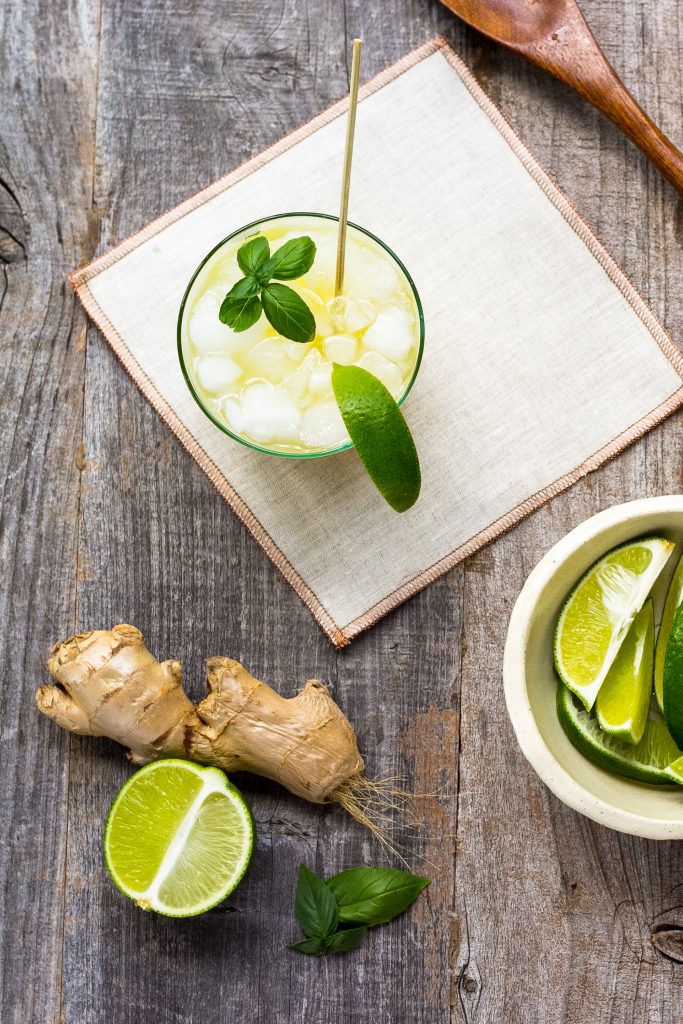
Is Homemade Ginger Beer Alcoholic? There is nothing better than having a ginger beer on a hot summers evening. However, if you prefer to have an alcoholic ginger there is not many options available as the vast majority of commercially ginger beer is non-alcoholic. So can you make homemade ginger beer the is alcoholic?
Homemade Ginger Beer can be made both alcoholic and non-alcoholic. The alcohol content of the ginger beer is dependent upon the amount of sugar that is added to the recipe, the higher the sugar content the higher the alcohol content. In the brewing, process yeast is added to the recipe to convert the sugar to carbon dioxide and ethanol, this is used to carbonate the drink within the bottle but it can also be used to increase the alcohol content.
However, making alcoholic ginger takes significantly longer than Non-alcoholic ginger beer this is because of the fermentation time required to convert the sugar. Most recipes require approximately 1 to 2 weeks to ferment. The fermentation needs to be done in a container that contains an airlock. Airlocks are necessary they protect ginger beer from bacterial contamination while allowing the carbon dioxide produced from the fermentation to escape.
Once the initial fermentation is completed the beer can be bottled with a small amount of sugar before being sealed. The sugar added at the bottling stage will be converted by the yeast into carbon dioxide creating a fizzy drink. To make sure that the drink is fully carbonated you will need to wait a week of 2 after bottling.
Why Do Ginger Beer Bottles Explode?
You will often hear stories from your parents and grandparents about someone who made a batch of ginger beer that exploded, so what went wrong?
Many of the recipes that I have seen on the internet that claim to be “old fashion ginger beer” are quite literally recipes for disaster. For example, the recipe from www.toriavey.com is a potentially dangerous recipe because they use sugar to sweeten the drink and then add yeast without allowing it to ferment before bottling.
The post advises to release the gas from the bottle daily and while that can manage the pressure of the bottle there is still the potential for an explosion if you miss a day or two or the temperature rises. Not to mention the general inconvenience of having to open a bottle on a daily basis.
If you leave the yeast out of a recipe like that you can reduce the chances of a problem however there remains the risk of wild yeast, that is present in the atmosphere, can get into the bottle and start the fermentation process without your knowledge. As such it is far better to actively manage the production of carbon dioxide to ensure that the level of carbonation is controlled. This will produce a stable drink that can be store for a couple of years if necessary.
What Equipment Do You Need To Make Ginger Beer?
To make ginger beer successfully there are four pieces of equipment I would highly recommend; a fermenter, airlock, filling wand, and a capper. The items are low-cost and will pay for themselves after the first batch. A full batch will make 60 to 65 330ml bottles of ginger beer. Additionally, this basic equipment will allow you to make normal beer as well from an all-grain extract (essentially a beer flavor base).
The fermenter is an essential piece of equipment if you want to make an alcoholic beverage whether it be beer or ginger beer or any other thing you might like to make. However, you can get away without one if you are making a non-alcoholic version.
There are numerous fermenters on the market that vary in price enormously, however, if you are someone that just wants to make the occasional batch a really basic fermenter is just fine. Of the basic models on the market, the one we recommend is from Home Brew Ohio because it is relatively cheap and it has a tap on the bottom of the vessel.
It is possible to buy cheaper fermenters than this one however they don’t have the tap at the bottom will allow the ginger beer to be filled directly out of the container without the need for a siphon. A picture of the fermenter is shown below, click here to see the latest price on Amazon.

In addition to a fermenter, you will also need an airlock that is designed to fit into the hole in the lid of the ferment. When in operation the airlock is half-filled with water which allows the gas to bubble through the water but it will prevent bacteria from getting in. There are two main types, the S-type and a 3 piece airlock, S-type are slightly cheaper but 3 piece airlocks are easier to clean, however, there isn’t that much difference between the two, click the links to see the latest price on Amazon.
The filling wand is a piece of equipment, that is not absolutely essential but is certainly makes filling the bottles easier as they provide a consistent and accurate fill level. Filling wands are basically tubes that have the open end connected to the fermenter tap at one end and a pressure-activated seal that releases the beer into the bottle when the seal is pushed against the bottom of the bottle.
When the wand is removed from the bottle that is filled the level in the bottle goes down leaving the amount of headspace. There are basic types that are around 1ft long that connect directly to the tap or you can get ones that come with a tube which is better because you can leave the bottles in the carton and place the wand into the bottle one at a time. To compare the prices on Amazon of the basic model and the models with a tube click on the links. To read more about the differences between fillers click here.
The last piece of equipment that is very useful to have but again not absolutely essential is a bottle capper. A bottle capper allows you to reuse crown seal beer bottles rather than using plastic bottles soft drink bottles. Glass bottles allow the ginger beer to be stored longer, to learn about the best bottles to recycle click here.
Like the other pieces of equipment discussed in this article, the are a couple of different types of cappers however the cheapest one on the market is the Red Baron Capper, which is shown in the picture below. They are a dual handle type that works well but is not as fast as other cappers which are significantly more expensive. If you are just making the occasional batch the Red Baron is the one to go for, click here to see the latest price on Amazon.

How To Make Ginger Beer
The recipe below will make 5.2 gallons (20 litres) of ginger beer.
INGREDIENTS
2.7 lbs (1.25 kg) of Grated Ginger
2.2 lbs (1 kg) Sugar
3.3 lbs (1.5 kg) of Malt Extract
1 Sachet Yeast
1 Pack Carbonation Drops
The less common ingredients can be found on Amazon however, it is important to note that ordinary baker’s yeast from the grocery store can be used instead of brewers’ yeast, to read about the difference click here. Additionally, Carbonation drops are a convenient way to carbonate the beer at the end of the process but you can substitute plain sugar, however, the amount to be added will depend upon the bottle size you use. The table below provides an indication of the quantity required, however, to learn more about carbonation drops vs sugar click here.
| Bottle Size | Grams/Ounces | Teaspoons* |
| 330 ml | 3.6 g/0.12 oz | 1/2 tsp |
| 500 ml | 5.4 g/0.19 oz | 1 1/2 tsp |
| 750 ml | 7.2 g/0.25 oz | 1 tsp |
The Brewing Method
- Before any type of brewing start by sanitizing the fermenter, this can be done using a specialized sanitizer or you can just use really hot water.
- Add the ginger and malt extract to a large pot and add a few quarts (litres) of water, the precise about is not critical.
- Bring the pot to a rolling boil for 10 to 20 minutes to extract the flavor from the ginger.
- At the end of the boil the sugar and ensure that it is fully dissolved.
- Cool the pot and transfer the ingredients to the fermenter.
- Fill the fermenter with water to make the volume up to 5 gallons. When you are making up the volume check the temperature of the beer, it should be ideally around 68°F (20°C) when the fermentation process starts.
- Sprinkle the yeast on the surface of the liquid and seal the fermenter and place the airlock into the hole in the lid. The airlock should be approximately half-filled with water.
- After about 24 hours you should see bubbling from the fermentor and the fermentation process will take between 1 to 2 weeks to complete. Once the bubbling stops leave the ferment for a few days before bottling.
- To bottle your brew start by sanitizing the bottles. Add 1 x carbonation drop per 330-370ml of volume in the bottle then fill the bottles. Note that you must leave headspace in the bottle for carbonation.
- Leave the bottles to stand for at least 2 weeks at room temperature, as this will allow the beer to carbonate.
Additional Notes
- To make a Non-Alcoholic version of this ginger beer, leave out the malt extract and sugar.
- To make a gluten-free version replace the malt extract additional sugar.
- You can also try adding cinnamon and lemon zest to the brew to add flavor.
- While most people drink ginger beer by itself, I would highly recommend mixing it 50/50 with orange juice for a particularly refreshing drink.